Thursday, April 4, 2013

14 easy steps to make your computer run faster.


STEPS TO MAKE YOUR COMPUTER FASTER.


  1. Check your hard disk space. As a rule, you want to keep at least 15% of the hard disk space free to keep the computer running smoothly. Simply go to My Computer, right-click on Hard Drive, and go to Properties. There you’ll see a pie chart of your free versus used space. If it’s mostly full, you’ll want to start by removing unnecessary programs and files; it it’s not, you probably want to tackle the actual way your computer operates.
     
  2. Remove any programs you do not use. Go to Control Panel > Add or Remove Programs (or Uninstall a Program, depending on your operating system) to find a master list of programs installed on your computer. Some things will strike you as useless immediately, in which case you can remove them right away. Others won’t look familiar to you and may require you some research.
    • It may help to see how often you use the program. If you right-click one of the column titles above your program list (ex. Name, Publisher, Size, Installed On, etc.), you should be able to add additional characteristics by which to judge your programs. For example, find Last Used On on the list of options and check it; a column displaying the last time you used each program will now appear and can also be used to sort your programs. Some programs will not have been used in years and may be candidates for deletion.
    • When in doubt, don’t remove anything you don’t recognize; it may be critical to the function of your computer,you can always leave a comment below and I will respond. – and if you delete twelve different things only to discover that your computer no longer works properly, it will be very difficult to determine where exactly you went wrong.
     
  3. Delete files you don't need. Unless you have very little storage space on your computer or simply have an abundance of unnecessary documents, deleting small files won’t make much of an impact on your computer’s overall function. However, any large files like movies you never watch, photos you don’t need, or songs you never listen to can really gum up the works and should definitely be removed.
    • Don’t forget to empty your recycling bin.
     
  4. Prevent unnecessary programs from starting when the computer boots. The more programs try to run while your computer initializes, the slower everything will be. Revise your startup programs by altering your system configuration via MSConfig.
     
  5. Install an anti-virus program and a spyware scanner. The fewer bugs, viruses, and bits of adware your computer has to manage, the more time it will have to devote to other processes. While you’re at it, make a point of keeping Windows up-to-date; not only will this keep Windows itself in better shape, but some viruses ride in on Windows updates that are downloaded way after the fact (and therefore not monitored as closely).
     
  6. Run a Disk Cleanup. This can clean up hundreds of megabytes of temporary files – sometimes even gigabytes (if you have Windows XP, Vista, or 7). It will also open a window in which you can chose what to delete. Go to My Computer, right-click the Hard Drive and select Properties, and then click Disc Cleanup (within the General tab). Check all the boxes except for the game files and setup files.To use Disk Cleanup:

    Windows 8 users

    1. Open Disk Cleanup by swiping in from the right edge of the screen, tapping Search (or if you're using a mouse, pointing to the upper-right corner of the screen, moving the mouse pointer down, and then clicking Search), entering Disk Cleanup in the search box, tapping or clicking Settings, and then tapping or clicking Free up disk space by deleting unnecessary files.
    2. In the Drives list, tap or click the drive that you want to clean up, and then tap or click OK.
    3. In the Disk Cleanup dialog box, on the Disk Cleanup tab, select the check boxes for the file types that you want to delete, and then tap or click OK.
    4. In the message that appears, tap or click Delete files.
    More information and instruction is available to help you to delete system files in Windows 8.

    Windows 7 users

    1. Click Start, click All Programs, click Accessories, click System Tools, and then click Disk Cleanup. If several drives are available, you might be prompted to specify which drive you want to clean.
    2. When Disk Cleanup has calculated how much space you can free up, in the Disk Cleanup for dialog box, scroll through the content of the Files to delete list.

      Disk Cleanup dialog box
    3. Clear the check boxes for files that you don't want to delete, and then click OK.
      • For more options, such as cleaning up System Restore and Shadow copy files, under Description, click Clean up system files, and then click the More Options tab.
    4. When prompted to confirm that you want to delete the specified files, click Yes.
    After a few minutes, the process completes and the Disk Cleanup dialog box closes, leaving your computer cleaner, performing better, and potentially increasing your PC speed.

    Windows Vista users

    Watch the demo (1:00)
    1. In the Start menu, click All Programs, click Accessories, click System Tools, and then click Disk Cleanup.
    2. In the Disk Cleanup Options dialog box, choose whether you want to clean up your own files only or all of the files on the computer. If you are prompted for an administrator password or confirmation, type the password or provide the confirmation.
    3. If the Disk Cleanup: Drive Selection dialog box appears, select the hard disk drive that you want to clean up, and then click OK.
    4. Click the Disk Cleanup tab, and then select the check boxes for the files you want to delete.
    5. When you finish selecting the files you want to delete, click OK, and then, to confirm the operation, click Delete files. Disk Cleanup then removes all unnecessary files from your computer. This may take a few minutes.
    The More Options tab is available when you choose to clean files from all users on the computer.

    Windows XP users

    1. Click Start, and then click My Computer. Right-click Local Disk, and then click Properties. On the General tab, click the Disk Cleanup button. If several drives are available, you might be prompted to specify which drive you want to clean. Disk Cleanup will spend a few minutes examining your disk.

      Disk Cleanup dialog box
    2. In the Disk Cleanup for dialog box, scroll through the content of the Files to delete list.

      Disk Cleanup dialog box
    3. Clear the check boxes for files that you don't want to delete, and then click OK.
    4. When prompted to confirm that you want to delete the specified files, click Yes.
    After a few minutes, the process completes and the Disk Cleanup dialog box closes, leaving your computer cleaner and potentially performing better.
     
  7. Run a Disk Defragment. This will reconfigure the way the hard drive stores information for maximum efficiency. Go to My Computer, right-click the Hard Drive and select Properties, then go to the Tools tab and click Defragment Now.
     
  8. Check for any disk errors. These will also slow your computer down. Go to My Computer, right-click the Hard Drive and select Properties, then go to the Tools tab and click Check Now under the Error-Checking area. When the dialogue box opens, check both boxes.
    • If you get a window saying that Windows can't check the disk while it's in use, click on Schedule Disk Check and then OK. It will run on your next reboot.
     
  9. Turn off indexing. Go to My Computer, right-click the Hard Drive and select Properties, then unclick the box indicating that the drive should be indexed.
     
  10. Clear your Prefetch folder. Windows saves a file of the program you are using to make it start up faster. After years of use, this folder gets stuffed with irrelevant programs.
    • Open Notepad and type:
      del C:\Windows\Prefetch\*.* /Q
      Rundll32.exe advapi32.dll,ProcessIdleTasks
      (Copy and paste this text to ensure you don’t make any mistakes.)
    • Save as faster.bat (the .bat extension will run it as a batch file).
    • Run it! Simply double-click the file to initialize. In a few moments, the command prompt will disappear and your programs should run more smoothly.
     
  11. Change Prefetch Parameters. This a dangerous task to complete unless you follow these steps exactly. If you're not sure about anything, don’t continue.
    • Go to Start > Run and type regedit to initialize the registry editor.
    • Go to HKEY_LOCAL_MACHINE>SYSTEM>CurrentControlSet>Control>Session Manager>Memory Management>Prefetch Parameters to access the parameters.
    • Double-click EnablePrefetcher. Once the new window pops up, there should be a small, editable text box with the number 3 in it. (Windows allows 4 options: 0, 1, 2 and 3.) 3, the default, fetches everything.
    • Change this to 2. Your PC will boot a lot faster and your PC performance shouldn't be affected.
    • Click OK and then close regedit.
     
  12. Add RAM to your computer. To see if you need more RAM, initialize the Windows Task Manager by pressing CTRL+ALT+DELETE. Under the Performance tab, find the area devoted to Physical Memory. If the Free amount hovers around zero but the computer is still slow, you may need to take your computer in to add RAM
     
  13. Restart your computer. The computer usually needs to reboot to implement changes.
     
  14. Defragment your hard drive. This should make the system boot faster.

Wednesday, April 3, 2013

HOW TO FORMAT A COMPUTER WITH WINDOWS 7

Format Windows 7

how to format and install Windows 7Back then in the good old days in Port Harcourt it was more of how to format  a computer with windows 98 and windows 2000,then later it was windows XP and Vista.Windows 7 is far better than previous windows versions (XP and Vista). The install process is plain simple and easy to follow. Big Bravo! for Microsoft for this. Now, just follow these steps and you will install windows 7 in no time
You can Install Windows 7 via DVD Disk you’ve purchased or with bootable USB.
This post explains installing windows 7 with dvd disk.

First, insert your Windows 7 Boot Disk into your dvd drive and reboot your PC
  • While the PC is rebooting, you will be prompted ” Press any key to boot from CD…” Just press any key here
  • After you press a key, windows will load installation files.
  • Windows 7 setup will start
  • Select your language, time and currency format and keyboard input (US)
  • Click Install Now to proceed
  • Setup will load for a min or two
  • If you do, select I accept the license terms and click Next
  • If you are upgrading from Windows Vista select Upgrade, if you had Windows XP you have to select Custom (Advanced). Upgrade from Windows XP to Windows 7 is not available. Click Custom (Advanced)
  • Select the Partition where you want to install Windows 7 and click Next. You will need at least 5716mb free space.
  • If you don’t have enough free space to Install Windows 7, you will receive the following warning
  • If that’s the case, you will need to format the partition where you previously had Operating System installed. WARNING: Formatting a partition will erase all existing data on the partition, proceed only if you have backed up all your files!
  • If you want to format the partition, go to Drive optionsand format the partition where you want to install windows 7. Again, do this only if you have backed up your documents/files!
    click format and then yes
  • After you press Next, Windows 7 Installation will begin. Approximately takes about 30 min to 1 hour to finish, depending on your computer speed.
  • After half an hour, setup is complete and windows 7 installation is almost finished. Few more minutes
  • Now your computer will reboot, since the Windows 7 DVD boot disk is still in the drive, the message press any key to boot from DVD will appear. We already did that, so this time DO NOT press anything. Just wait 5 sec and your PC will continue booting and finish installing your operating system.
  • Windows will continue booting and installing, almost there!
  • Finally!Insert your name (this will be your windows username)
  • If you want to, insert password for your computer.
  • Insert your Windows 7 product key and press Next
  • Do you want Microsoft Updates for your new operating system? It is highly recommend you know…! Select use recommended settings
  • It’s time for Time zone, select yours from the drop down menu
  • Depending on your location, select the appropriate network location.
  • If you have more than 1 computer, type homegroup password for sharing files. Make sure to remember it
  • Windows is finalizing your settings
  • Can you see the finish line ? Yup, we’re there
  • That’s it. Now insert your computer manufacturer drivers CD and install drivers. Also FYI, Windows 7 has great driver support, go to Start –> Control Panel –> Select View By = Small Icons –> Click Windows Update
  • Check for updates and click on optional updates, to see which drivers windows 7 found for your computer automatically.
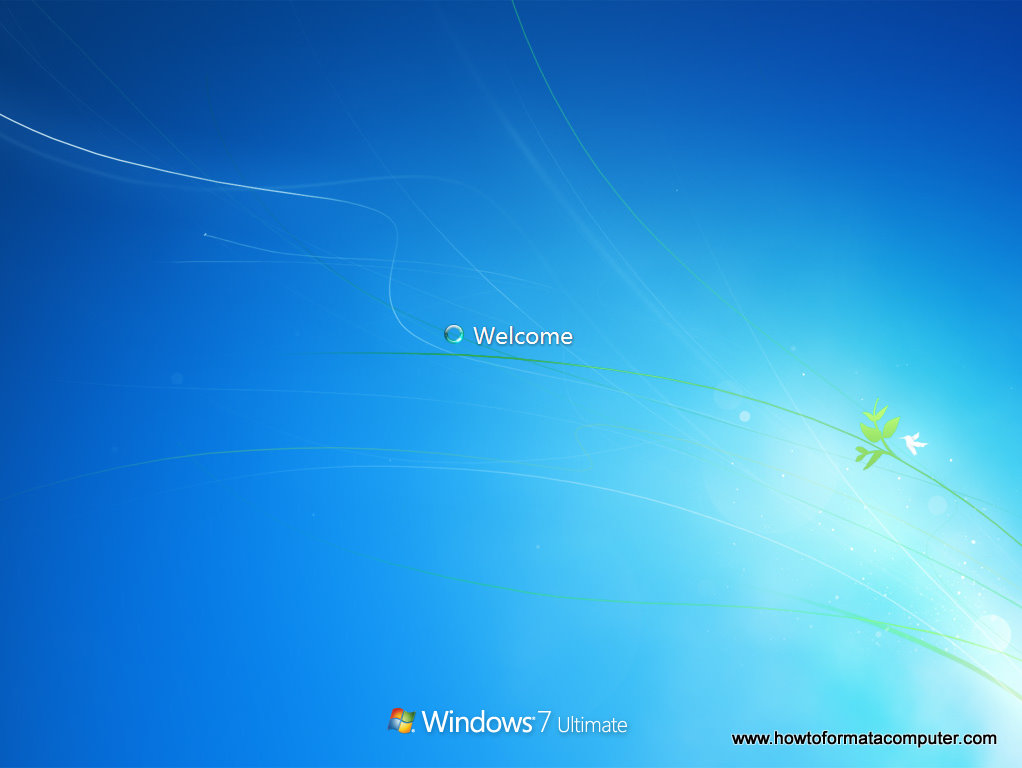
  • Install Windows 7 - Welcome screen
    Install Windows 7 - Welcome screen
     

Thursday, March 28, 2013

DO NOT BUY SAMSUNG GALAXY S4 IF YOU HAVE S3 OR NOTE 2

A close look at the new Samsung galaxy S4 will bring your mind to work. But the good thing is that if you  are using S3 or Note2, then buying a samsung S4 will be equal to buying another S3 or Note2(updated version). The difference between S4 and S3 is basically in software innovations and not hardware,and for those using S3 and Note2, they can still enjoy all the features of S4 by doing an update which will be available soon. A research by naijatechiworld shows that S3 users are already waiting for the updates.


A physical comparison between Samsung Galaxy S4 and Samsung Galaxy S3 won’t reveal much difference; in fact both have a lot of things in common as the image below will show you.
Samsung Galaxy S4 and Samsung Galazy S3 compared
Processor & RAM:
An average mobile phone user may not even notice the difference in the processor while using the two phones, probably the Samsung Galaxy S4 will be a faster phone than the Samsung Galaxy S3 because the RAM is higher 2GB against 1GB for Samsung Galaxy S3. But then the truth is that most mobile phone users cannot not even consume the 1GB RAM except you are playing a HD game on your device.
Operating System & Display:
Samsung Galaxy S4 is running on the latest Android OS Jelly Bean 4.2.2 against the Android 4.1.2 version for the Samsung Galaxy S3 which can as well be updated to 4.2.2.  Samsung has also improved from the 4.8” HD super AMOLED 1280×720 display resolution and 306ppi pixel density to 5” Full Super AMLED 1920×1080 and 440ppi pixel density for the Samsung Galaxy S4, but what difference does that make for an average user?
Camera:
The new Samsung Galaxy S4 also came with two cameras just like the Samsung Galaxy S3 but the difference is that the Samsung Galaxy S4 now has 13MP back camera and 2MP front camera as against the 8MP back camera and 1.9MP front camera for the Samsung Galaxy S3. You won’t be able to notice difference in picture quality between these two phones if you are not told.
Dimensions:
The new Samsung Galaxy S4 is just 136.6mm (height) x 69.8mm (Width) x 7.9mm (Thickness) and just weighs 130g while its predecessor is just 136.6mm (height) x 70.6mm (Width) x 8.6mm (Thickness) and weighs 133g. The Samsung Galaxy S4 is slimmer yet the change is almost negligible.
Battery:
The Samsung Galaxy S4 is just 2600mAh as against 2100mAh of the Samsung Galaxy S3 which means a longer lasting time, yet every battery will still run out if it is not recharged.
Now that is mainly the hardware specification difference of the Samsung Galaxy S4 and Samsung galaxy S3, so let us look at what is new with the Samsung Galaxy S4 software.

Samsung Galaxy S4 Software Specifications:

Smart Pause: The Samsung Galaxy S4 Smart Pause is a feature that automatically pauses a video when the user moves his eyes away from the screen and automatically resumes play when he returns his gaze.
Smart Scroll: The Samsung Galaxy S4 Smart Pause is a feature that automatically scrolls a webpage or document when your eye reaches the bottom of the display.
Air view: This feature allows you control your Samsung Galaxy S4 without actually touching the device.
WatchON: This Samsung Galaxy S4 feature allows you to control a TV with your Samsung Galaxy S4 device.
Optical Reader: The Samsung Galaxy S4 Optical reader allows you to easily scan a business card for information like phone numbers emails and contacts.
Group Play: The Samsung Group play allows users to play the same music or game on multiple devices at a time. So you can play the same game with your friends or even play same music with your pals using this feature.
Dual Shot: This feature allows you to use both the front and back camera at the same time. Now you don’t have to miss out of the family picture again because you are the one taking the photos.
ChatON/Screen Sharing: This feature allows you to chat using both the front and back cameras at the same time. Now screen sharing is possible on mobile thanks to the Samsung developer’s team.
S Translator: Samsung Galaxy S4 S Translator does exactly what Google translator does live on your Samsung Galaxy S4 device. You can chat with friends in foreign language and be sure your S4 will translate it to your preferred language. 10 languages are currently supported for this feature. It also translates emails and texts.
S Voice: The S Voice is just like the Google Voice search on the Samsung Galaxy S4, you can simply search for anything on your device with just a voice command.
S Health: this feature monitors your health goals, calculates the amount of burned calories, measures temperature and humidity from its surrounding area.

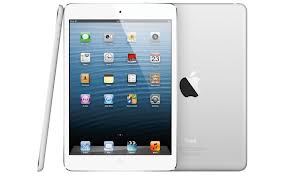
How to make folders on iPad?

Here are the steps in creating virtual containers on Apple’s tablet:
  1. Enter into the move state.
You can do this by placing your finger on the icon of a certain app. Hold the icon down until all icons start to jiggle. You will also notice that some icons display a black circle that has an X mark right in the middle.
You need to be in this state so you can move icons to different places. As long as your finger is on the screen, holding the icon down, it will move with your finger.
  1. Drop the icon on top of another icon.
By dropping an icon on top of another icon, the said app is highlighted and you will notice a dark square. This simply signifies that you can add a virtual container when you lift your finger. You can place other icons in the created virtual container by dragging and dropping them to the said container.
This device will automatically name the container based on the type of application the icons represent. For instance, if you drag Game 1 and drop it on top of Game 2, the device will automatically create a virtual container named “Game.”
  1. Rename the container if you wish.
If you want to rename Game into Play, you just need to tap the title area of the container. Then type in a new name, say, Play, using the on-screen keyboard. As mentioned earlier, this device automatically assigns a smart name for the created virtual container according to the functionality of the two icons you have combined.
  1. Press the Home button.
Once you are done creating virtual containers, you may press the Home button of your device to exit.
After you are done creating containers, you can tap the container’s icon so you can access the apps you have placed in there. To exit from the container, you just need to press the Home button.
You will notice that you find it difficult to move an app from one screen or page to the next in order to add a virtual container. The reason for this is that the device lets you organize icons on one screen. To have it in an easier manner, you just need to drag and drop the icon from its current screen to the screen where you want to create a virtual container. Once you have placed all icons you want to organize on one page, you can now pick them up to create a new virtual container for these icons.
These virtual containers are useful in saving all your apps that you rarely use. In this way, the number of icons displayed on the screen pages is significantly reduced. This is especially true if you have more than 50 apps on your device.
If you wish to remove the virtual container, you just have to tap it. Then, hold down an app that is in that container until all icons start to jiggle. When the icons within that container wobble, drag each icon found in that container to the Home screen.

Sunday, March 24, 2013

HOW TO SETUP BB Z10


 To begin using your new BlackBerry Z10, Insert the SIM card MTN,GLO,AIRTEL  or ETISALAT, SD card and battery. Power up your handset and follow the step-by-step instructions below to navigate successfully through the First Time Setup procedure.
  1. Decide whether to use a 3G connection on your smartphone.
  2. If you are near a wireless network, you can connect to it on the Wi-Fi Setup page. Simply find the Wi-Fi network you wish to join and enter the password to access it.
    BB Z10 - first time setup 1
  3. Read the License Agreement and accept if you agree to its terms.
  4. Choose which country your Z10 will be operating in.

    Agent tip

    At any point, to move through a screen or skip a screen, you may need to swipe a finger from right to left across the display.
  5. Set up a new BlackBerry ID, or sign in with an existing one if you are already a BlackBerry user. If you encounter any difficulties with the sign-in process, you can call Stanley on 08037420658  for some one-on-one support.
  6. Decide whether to turn on the Diagnostics and Locations services by choosing either On or Off. Turning Diagnostics on can help improve the way the device works by sending information to BlackBerry about any problems you come across. Turning on Locations will tailor search results and other information to suit your current whereabouts.
  7.  Check for updates to make sure your Z10 is running at its best. Your smartphone needs at least 20% battery to install any updates!
  8. Complete the Gestures tutorial to learn the best way to navigate your new handset. You must complete the tutorial to finish the setup wizard.
  9. BB Z10 - first time setup 2

Wednesday, March 20, 2013

The great Samsung Galaxy S4


  • Samsung Galaxy S4
  • Samsung Galaxy S4
  • Samsung Galaxy S4
  • Samsung Galaxy S4
  • Samsung Galaxy S4
  • Samsung Galaxy S4
  • Samsung Galaxy S4
  • Samsung Galaxy S4
  • Samsung Galaxy S4


Samsung Galaxy S4 will soon hit the Nigerian market and definitely this end of discussion smartphone will be the next phone every body will want to own.Although many of the features had been leaked in the weeks leading up to the event, the launch was still a time for Samsung to show-off its latest handset, while no doubt making sure that Apple's got its work cut-out with the iPhone 5S.
Here we'll take a look at the phone's new features and outline its key specifications, as well as rounding up the current price in Nigeria.

SAMSUNG GALAXY S4 DESIGN

With the Galaxy S3 proving to be such a success, Samsung hasn't strayed too far from that design with the Galaxy S4. The rounded edges and lozenge-shaped home button at the bottom of the phone are all instantly recognisable.
Samsung Galaxy S4
The Samsung Galaxy S4 is thinner and lighter than the Samsung Galaxy S3
While the S3 looked and felt, well, quite plasticy, the Samsung S4 looks that much nicer and more like the high-end phone that it should be. It has a polycarbonate case, but it's now slimmer (7.9mm) and lighter (130g) than its predecessor.
Two versions of the phone will be available: Black Mist and White Frost. It's hard to pass judgement on the phone until we've seen it in the flesh, but in the shots we've seen it certainly looks like a step up from the Samsung Galaxy S3.
Samsung Galaxy S4
Available in black or white, the Samsung Galaxy S4 is instantly recognisable

SAMSUNG GALAXY S4 SCREEN

As expected, the Galaxy S4 has a 5in Full HD (1,920x1,080) Super AMOLED screen. That's a stunning 441ppi, making this one of the highest-density phones that we've seen. The HTC One manages slightly more at 468ppi, thanks to its slightly-smaller 4.7in Full HD screen. On balance, though, you're going to find it hard to tell the difference or spot individual pixels on either screen.
There was no mention of the Green PHOLED technology, which was rumoured to be making its first appearance here. However, we've been impressed with Samsung's Super AMOLED technology before and it's always been power efficient, helping to save battery life.
As expected, the screen can be operated just by hovering your finger over it, giving rise to two new features. Air View lets you hover over content, such as an email or photo, to preview it without having to open it. Air Gesture, lets you change tracks, scroll through a web page or answer a call with the wave of your hand. We haven't had chance to try the system out yet, but this should make fine-control of the touchscreen operating system that little bit easier.
Samsung Galaxy S4
Air View and Air Gesture let you operate the touchscreen without touching it
Gorilla Glass 3 helps make the phone durable, although we'd still recommend a screen protector or case if you're going to keep your phone in a pocket with sharp items, such as keys.

SAMSUNG GALAXY S4 CAMERAS

Cameras are an important part of any smartphone, with many people preferring them to compact cameras. From the specifications, Samsung hasn't let us down with the Galaxy S4 camera, with a 13-megapixel rear camera, complete with Flash and a high-speed shutter mode. At the front is a 2-megapixel camera.
Samsung Galaxy S4
The 13-megapixel rear camera certainly has impressive specifications, but the front camera can be used to control the phone
Now, two cameras on a smartphone is hardly something new, but with Dual Camera you can operate both of them at the same time. It feels a little gimmicky to us, but the idea is that you can film yourself with the front camera and then superimpose yourself on the footage from the rear camera. The examples we've seen look a little twee and we're not sure that most people want their faces to appear surrounded by a postage stamp border over the footage they're recording.
Samsung Galaxy S4
You can superimpose yourself as a floating stamp in videos, if you like that kind of thing
The front camera also serves a purpose in controlling the phone with Smart Pause. This technology knows when you're looking at the screen so it can, for example, pause a video when you turn your head and look away. As soon as you look back, the video continues. It's a neat way of using the cameras for more than just still images and video.

SAMSUNG GALAXY S4 PROCESSOR

We were expecting the Octa-Core Samsung Exynos 5 processor in the phone and that's an option, with a 1.6GHz model. However, a 1.9GHz Quad-Core version of the phone will also be sold, depending on where you live in the world. Samsung hasn't specified yet which version we'll get in the UK, although we would expect to get the Octa-Core model.
The company tweeted a rendering of the new chip, which is also rumoured to power the new Galaxy Note 3 phone/tablet, from its @SamsungExynos Twitter account, so whetting the appetites of Samsung fans everywhere.
The new chip's eight-core design is based on ARM's big.LITTLE architecture. This means that there are four powerful Cortex-A15 cores for the phone's most power-hungry functions, and four lower-power Cortex-A7 models to take care of simpler tasks. When the phone isn't needed to do anything fancy, the more powerful cores shut down, extending battery life.

SAMSUNG GALAXY S4 BATTERY

Speaking of battery life, the new handset will use a 2,600mAh battery. That's 500mAh bigger than the one in the S3 and should be big enough to cope with the slightly-enlarged screen, and the greater demands of 4G, while still running all day.
The battery is also removable, so you can carry a charged spare if you're going to be out for a long time. It also means that a failing battery can easily be replaced.

SAMSUNG GALAXY S4 4G AND WIRELESS

You can't make a modern phone and not support the latest wireless standards, so the Samsung Galaxy S4 has full support for 4G LTE networks. Global 4G support has been promised, supporting download speeds of 100Mbit/s and uploads of 50Mbit/s. Full 3G and 2.5G support is, of course, also present.
For use at home there's also better Wi-Fi support, with the new 802.11ac standard supported. We've seen this networking standard deliver speeds well over 200Mbit/s, so using super-fast broadband speeds on your phone at home is going to easy.

SAMSUNG GALAXY S4 NFC

NFC makes an appearance, so the phone will be compatible with Google Wallet, so you can pay for goods in compatible shops using just your phone. It will also support Visa's payWave, widening the choice and range of places that you can shop in.
In addition, Samsung showed some other ways that NFC can be used. One of the most different was Group Play. By tapping your Samsung Galaxy S4 to another one, you can share music and pictures. Samsung has also promised that the technology will support multi-player gaming and it's opening up the SDK to encourage other companies to develop for it.

SAMSUNG GALAXY S4 STORAGE

No great surprises on the storage front, with 16GB, 32GB and 64GB models announced. However, it's good to see that there's still a microSD card slot, so you can add up to 64GB of storage. Depending on the prices, it may even work out cheaper to buy a lower-capacity model and then upgrade it when you need to with a memory card.

SAMSUNG GALAXY S4 S HEALTH

With fitness accessories apps being big business, Samsung clearly doesn't want to miss out and has launched S Health with the Galaxy S4. Using your phone a variety of accessories, you'll be able to measure your weight and health.

SAMSUNG GALAXY S4 OTHER FEATURES

If all of that wasn't enough, the Galaxy S4 also has an IR transmitter, which you can use to control your home entertainment kit via the WatchOn app. There's also S Voice Drive, which puts up a simpler interface for when you're driving and recognises voice prompts. Finally, when you're abroad the translation services let you type in a message and have the phone read it out in a different language; the spoken reply is then converted back into your language on the screen.

SAMSUNG GALAXY S4 RELEASE DATE

Samsung has promised to have the phone out by the end of April. Exact launch dates will depend on the country, but we expect the UK to be one of the first on the list. We'll bring you updated information as and when it becomes available.

SAMSUNG GALAXY S4 PRICE AND UK NETWORKS

The Samsung S4 will be available in MTN,ETISALAT,GLO and AIRTEL with a possible price of  N110,000

Tuesday, March 19, 2013

Comparing BlackBerry Z10 , Apple iPhone 5 and Samsung Galaxy SIII

This is the comparison. Take some time and study the differences.


HOW THE NEW BLACKBERRY MATCHES UP


BlackBerry Z10Apple iPhone 5Samsung Galaxy SIII

BlackBerry's Z10 - a superb phone, but a little too late
iPhone 5. The Samsung Galaxy S3 has proved to be popular with consumers
Dimensions65.6 x 130 x 9mm58.6 x 123.8 x 7.6 mm70.6 x 136.6 x 8.6mm
Weight No info 112g 133g
Display4.2in multi-touch LCD with 1290x768 resolution4in multi-touch Retina display with 1136x640 resolution4.8in multi-touch sAMOLED with 1290x768 resolution
SoftwareBlackBerry 10 OSiOSAndroid 4.0 (Ice Cream Sandwich)
On-board memory16GB flash16GB / 32GB / 64GB flash versions available16GB / 32GB / 64GB flash versions available
MicroSD slot Yes No Yes
ProcessorDual Core 1.5GHzDual Core 1.3GHzQuad Core 1.4GHz
RAM 2GB 1GB 1GB (international version), 2GB (selected markets)
Battery life10hrs talk time / 305hrs standby (3G)8hrs talk time / 225hrs standby (3G)10.8hrs talk time / 750hrs standby (3G)
Rear facing camera8MP with auto focus and 1080p HD video8MP iSight camera with auto focus and 1080p HD video8MP with auto focus, 1080p HD video
Front facing camera2MP, 3x digital zoom, 720p HD video1.2MP Facetime camera with 720p HD video1.9MP
GPSAssisted, autonomous and simultaneous GPSAssisted GPS and GLONASSAssisted GPS / GLONASS available
BluetoothBluetooth 4.0 Low EnergyBluetooth 4.0 Low EnergyBluetooth 4.0 Low Energy
WiFi802.11 a/b/g/n enabled, 4G Mobile Hotspot802.11a/b/g/n enabled802.11 a/b/g/n enabled
SensorsAccelerometer, magnetometer, proximity, gyroscope and ambient light sensorThree-axis gyro, accelerometer, proximity sensor, ambient light sensorAccelerometer, geo-magnetic, gyroscope,  barometer and RGB light sensor

It also boasts a new feature called balance to switch between a personal and business mode - each with its own applications, wallpaper and settings.
'People run around with two phones, a private one and a personal one,' said Mr Heins.
'We wanted to address that, and people can switch with a single flick.'
He said the new handsets were for 'people who are hyper-connected socially, who need balance in both personal and professional lives.
'People who want to flow, who don't want a home button. Blackberry 10 will keep them moving.'

Another new feature called 'active frames' allows people to have several apps open at once, and easily.

Popular Posts