Tuesday, April 23, 2013
Saka just ported....many more can do same

Thursday, April 18, 2013
How to Edit the Code of a Joomla Template
Below is how you can edit a joomla template and make it look like you did the whole job. An average Nigerian is now a web designer all because Joomla has made everything easy.

When you customize a template in Joomla, you typically make changes to its CSS code.
To open a template’s CSS file for editing, follow these steps:- In the template’s Details page, click the Edit CSS button.The Customize Template page opens. This page lists the CSS files associated with the template — usually, a lot of them.
- Click the name of the style you want to edit.The style’s CSS file (template.css) opens for editing in Template Manager.


/*****************************/
/*** Core html setup stuff ***/
/*****************************/
html {
 height: 100%;
 margin-bottom: 1px;
}
form {
 margin: 0;
 padding: 0;
}
body {
    font-family: Helvetica,Arial,sans-serif;
    line-height: 1.3em;
    margin: 0px 0px 0px 0px;
    font-size: 12px;
    color: #333;
}
a:link, a:visited {
    text-decoration: none;
    font-weight: normal;
}
a:hover {
    text-decoration: underline;
    font-weight: normal;
}
input.button { cursor: pointer; }
p { margin-top: 0; margin-bottom: 5px; }
img { border: 0 none; }
/*****************************************/
/*** Template specific layout elements ***/
/*****************************************/
#page_bg {
    padding: 10px 0;
    margin-bottom: 1px;
}
div.center {
 text-align: center;
}
div#wrapper {
    margin-left: auto;
    margin-right: auto;
}
body.width_medium div#wrapper {
    width: 950px;
}
   .
   .
   .
Unfortunately, to edit this file you really have to know what you’re doing in CSS to make your own changes. (A good WYSIWYG code editor built into Joomla would be great for this situation.)
There’s a lot of debate about whether it’s better to use HTML tables or CSS to arrange components and modules in Joomla templates; both sides of the argument have strong points.
HTML tables, for example, are pretty rigid structures that make it hard for search engines to understand the content of your page. CSS implementations, on the other hand, vary widely from browser to browser, and some older browsers allow you to use only minimal CSS. The Beez template in Joomla is an example of a tableless CSS template.As you can see, truly customizing a Joomla template is not something to be undertaken lightly. So how do you get the template you want? You can download it. There are Joomla templates online. Some are free while others require a small fee to download.
Tuesday, April 16, 2013
How to extend BB Z10 battery life
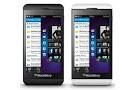
So many people using the BB Z10 have been complaining of poor battery life of the phone. Battery life varies depending on how you use your BlackBerry device. To help battery power last longer, below are the things to do :
- Use the power-saving options in your device settings. To adjust the screen brightness or change the screen lock timeout, on the home screen, swipe down from the top of the screen. Tap
Settings > Display.
- Turn down the device volume with the volume keys on the right side of your device. To adjust other volume settings, on the home screen, swipe down from the top of the screen. Tap
- Close any apps or features that you are finished using so that they aren't continously running in the background. Some features consume more battery power than others and should be closed or turned off when not in use. For example, the camera, the browser, Voice Control, GPS, and Bluetooth technology.
- If your device is out of a network coverage area, turn off the connection so that your device doesn't continuously search for a network signal. To turn off or change network connections, on the home screen, swipe down from the top of the screen. Tap
- Use the latest version of BlackBerry Device Software. If a software update is available for your device, a notification appears in BlackBerry Hub.
- Save data to a media card instead of your device storage.
- Turn off the camera flash.
Tip: Like most electronic devices, your device battery will drain less quickly if you keep it out of the sun and other hot places, keep the contacts clean, and charge it regularly. Avoid leaving your device turned off with a low battery power level for an extended period of time.
How to copy and paste in BB Z10.
Below is how to copy and paste in BB Z10.

- To highlight text, touch and hold the text. To change your selection, move the cursor indicators.
- Do one of the following:
- To copy the text, touch and hold the highlighted text. Tap
.
- To cut the text, touch and hold the highlighted text. Tap
.
- To copy the text, touch and hold the highlighted text. Tap
- To paste the text, touch and hold where you want to paste the text. Tap
.
Friday, April 5, 2013
MTN BB10 PLANS AND ACTIVATION CODES

Below are the data plans for BB10 and the various activation codes
| BlackBerry 10 Plans | Service Validity | Inclusive Data | Price | Activation Code (SMS) | ||
| BB10 Maxi | Monthly | 1.5GB | N3,000 | Text BBMAXIM to 21600 | ||
| Weekly | 350MB | N1,100 | Text BBMAXIW to 21600 | |||
| Daily | 50MB | N200 | Text BBMAXID to 21600 | |||
| BB10 Midi | Monthly | 500MB | N1,500 | Text BBMIDIM to 21600 | ||
| Weekly | 125MB | N550 | Text BBMIDIW to 21600 | |||
| Daily | 15MB | N100 | Text BBMIDID to 21600 | |||
| BB10 Lite | Monthly | 260MB | N1,000 | Text BBLITEM to 21600 | ||
| Weekly | 70MB | N350 | Text BBLITEW to 21600 | |||
| Daily | 10MB | N70 | Text BBLITED to 21600 |
Thursday, April 4, 2013
14 easy steps to make your computer run faster.

STEPS TO MAKE YOUR COMPUTER FASTER.
- Check your hard disk space. As a rule, you want to keep at least 15% of the hard disk space free to keep the computer running smoothly. Simply go to My Computer, right-click on Hard Drive, and go to Properties. There you’ll see a pie chart of your free versus used space. If it’s mostly full, you’ll want to start by removing unnecessary programs and files; it it’s not, you probably want to tackle the actual way your computer operates.
- Remove any programs you do not use. Go to Control Panel > Add or Remove Programs (or Uninstall a Program, depending on your operating system) to find a master list of programs installed on your computer. Some things will strike you as useless immediately, in which case you can remove them right away. Others won’t look familiar to you and may require you some research.
- It may help to see how often you use the program. If you right-click one of the column titles above your program list (ex. Name, Publisher, Size, Installed On, etc.), you should be able to add additional characteristics by which to judge your programs. For example, find Last Used On on the list of options and check it; a column displaying the last time you used each program will now appear and can also be used to sort your programs. Some programs will not have been used in years and may be candidates for deletion.
- When in doubt, don’t remove anything you don’t recognize; it may be critical to the function of your computer,you can always leave a comment below and I will respond. – and if you delete twelve different things only to discover that your computer no longer works properly, it will be very difficult to determine where exactly you went wrong.
- It may help to see how often you use the program. If you right-click one of the column titles above your program list (ex. Name, Publisher, Size, Installed On, etc.), you should be able to add additional characteristics by which to judge your programs. For example, find Last Used On on the list of options and check it; a column displaying the last time you used each program will now appear and can also be used to sort your programs. Some programs will not have been used in years and may be candidates for deletion.
- Delete files you don't need. Unless you have very little storage space on your computer or simply have an abundance of unnecessary documents, deleting small files won’t make much of an impact on your computer’s overall function. However, any large files like movies you never watch, photos you don’t need, or songs you never listen to can really gum up the works and should definitely be removed.
- Don’t forget to empty your recycling bin.
- Don’t forget to empty your recycling bin.
- Prevent unnecessary programs from starting when the computer boots. The more programs try to run while your computer initializes, the slower everything will be. Revise your startup programs by altering your system configuration via MSConfig.
- Install an anti-virus program and a spyware scanner. The fewer bugs, viruses, and bits of adware your computer has to manage, the more time it will have to devote to other processes. While you’re at it, make a point of keeping Windows up-to-date; not only will this keep Windows itself in better shape, but some viruses ride in on Windows updates that are downloaded way after the fact (and therefore not monitored as closely).
- Run a Disk Cleanup. This can clean up hundreds of megabytes of temporary files – sometimes even gigabytes (if you have Windows XP, Vista, or 7). It will also open a window in which you can chose what to delete. Go to My Computer, right-click the Hard Drive and select Properties, and then click Disc Cleanup (within the General tab). Check all the boxes except for the game files and setup files.To use Disk Cleanup:
Windows 8 users
Windows 7 users
-
Click Start, click All Programs, click
Accessories, click System Tools, and then
click Disk Cleanup. If several drives are available, you might
be prompted to specify which drive you want to clean.
-
When Disk Cleanup has calculated how much space you can free up, in the
Disk Cleanup for dialog box, scroll through the content of the
Files to delete list.
-
Clear the check boxes for files that you don't want to delete, and then click
OK.
- For more options, such as cleaning up System Restore and Shadow copy files, under Description, click Clean up system files, and then click the More Options tab.
- When prompted to confirm that you want to delete the specified files, click Yes.
Windows Vista users
Watch the demo (1:00)
-
In the Start menu, click All Programs,
click Accessories, click System Tools, and
then click Disk Cleanup.
-
In the Disk Cleanup Options dialog box, choose whether you
want to clean up your own files only or all of the files on the computer. If you
are prompted for an administrator password or confirmation, type the password or
provide the confirmation.
-
If the Disk Cleanup: Drive Selection dialog box appears,
select the hard disk drive that you want to clean up, and then click
OK.
-
Click the Disk Cleanup tab, and then select the check boxes
for the files you want to delete.
- When you finish selecting the files you want to delete, click OK, and then, to confirm the operation, click Delete files. Disk Cleanup then removes all unnecessary files from your computer. This may take a few minutes.
Windows XP users
-
Click Start, and then click My Computer.
Right-click Local Disk, and then click
Properties. On the General tab, click the
Disk Cleanup button. If several drives are available, you might
be prompted to specify which drive you want to clean. Disk Cleanup will spend a
few minutes examining your disk.
-
In the Disk Cleanup for dialog box, scroll through the
content of the Files to delete list.
-
Clear the check boxes for files that you don't want to delete, and then click
OK.
- When prompted to confirm that you want to delete the specified files, click Yes.
-
Click Start, click All Programs, click
Accessories, click System Tools, and then
click Disk Cleanup. If several drives are available, you might
be prompted to specify which drive you want to clean.
- Run a Disk Defragment. This will reconfigure the way the hard drive stores information for maximum efficiency. Go to My Computer, right-click the Hard Drive and select Properties, then go to the Tools tab and click Defragment Now.
- Check for any disk errors. These will also slow your computer down. Go to My Computer, right-click the Hard Drive and select Properties, then go to the Tools tab and click Check Now under the Error-Checking area. When the dialogue box opens, check both boxes.
- If you get a window saying that Windows can't check the disk while it's in use, click on Schedule Disk Check and then OK. It will run on your next reboot.
- If you get a window saying that Windows can't check the disk while it's in use, click on Schedule Disk Check and then OK. It will run on your next reboot.
- Turn off indexing. Go to My Computer, right-click the Hard Drive and select Properties, then unclick the box indicating that the drive should be indexed.
- Clear your Prefetch folder. Windows saves a file of the program you are using to make it start up faster. After years of use, this folder gets stuffed with irrelevant programs.
- Open Notepad and type:
del C:\Windows\Prefetch\*.* /Q
Rundll32.exe advapi32.dll,ProcessIdleTasks
(Copy and paste this text to ensure you don’t make any mistakes.) - Save as faster.bat (the .bat extension will run it as a batch file).
- Run it! Simply double-click the file to initialize. In a few moments, the command prompt will disappear and your programs should run more smoothly.
- Open Notepad and type:
- Change Prefetch Parameters. This a dangerous task to complete unless you follow these steps exactly. If you're not sure about anything, don’t continue.
- Go to Start > Run and type regedit to initialize the registry editor.
- Go to HKEY_LOCAL_MACHINE>SYSTEM>CurrentControlSet>Control>Session Manager>Memory Management>Prefetch Parameters to access the parameters.
- Double-click EnablePrefetcher. Once the new window pops up, there should be a small, editable text box with the number 3 in it. (Windows allows 4 options: 0, 1, 2 and 3.) 3, the default, fetches everything.
- Change this to 2. Your PC will boot a lot faster and your PC performance shouldn't be affected.
- Click OK and then close regedit.
- Go to Start > Run and type regedit to initialize the registry editor.
- Add RAM to your computer. To see if you need more RAM, initialize the Windows Task Manager by pressing CTRL+ALT+DELETE. Under the Performance tab, find the area devoted to Physical Memory. If the Free amount hovers around zero but the computer is still slow, you may need to take your computer in to add RAM
- Restart your computer. The computer usually needs to reboot to implement changes.
- Defragment your hard drive. This should make the system boot faster.


Wednesday, April 3, 2013
HOW TO FORMAT A COMPUTER WITH WINDOWS 7
Format Windows 7
 Back then in the good old days in Port Harcourt it was more of how to format a computer with windows 98 and windows 2000,then later it was windows XP and Vista.Windows 7 is far better than previous windows versions (XP and Vista). The install process is plain simple and easy to follow. Big Bravo! for Microsoft for this. Now, just follow these steps and you will install windows 7 in no time
You can Install Windows 7 via DVD Disk you’ve purchased or with bootable USB.
This post explains installing windows 7 with dvd disk.
First, insert your Windows 7 Boot Disk into your dvd drive and reboot your PC
- While the PC is rebooting, you will be prompted ” Press any key to boot from CD…” Just press any key here
- After you press a key, windows will load installation files.
- Windows 7 setup will start
- Select your language, time and currency format and keyboard input (US)
- Click Install Now to proceed
- Setup will load for a min or two
- If you do, select I accept the license terms and click Next
- If you are upgrading from Windows Vista select Upgrade, if you had Windows XP you have to select Custom (Advanced). Upgrade from Windows XP to Windows 7 is not available. Click Custom (Advanced)
- Select the Partition where you want to install Windows 7 and click Next. You will need at least 5716mb free space.
- If you don’t have enough free space to Install Windows 7, you will receive the following warning
- If that’s the case, you will need to format the partition where you previously had Operating System installed. WARNING: Formatting a partition will erase all existing data on the partition, proceed only if you have backed up all your files!
- If you want to format the partition, go to Drive optionsand format the partition where you want to install windows 7. Again, do this only if you have backed up your documents/files!
click format and then yes - After you press Next, Windows 7 Installation will begin. Approximately takes about 30 min to 1 hour to finish, depending on your computer speed.
- After half an hour, setup is complete and windows 7 installation is almost finished. Few more minutes
- Now your computer will reboot, since the Windows 7 DVD boot disk is still in the drive, the message press any key to boot from DVD will appear. We already did that, so this time DO NOT press anything. Just wait 5 sec and your PC will continue booting and finish installing your operating system.
- Windows will continue booting and installing, almost there!
- Finally!Insert your name (this will be your windows username)
- If you want to, insert password for your computer.
- Insert your Windows 7 product key and press Next
- Do you want Microsoft Updates for your new operating system? It is highly recommend you know…! Select use recommended settings
- It’s time for Time zone, select yours from the drop down menu
- Depending on your location, select the appropriate network location.
- If you have more than 1 computer, type homegroup password for sharing files. Make sure to remember it
- Windows is finalizing your settings
- Can you see the finish line ? Yup, we’re there
- That’s it. Now insert your computer manufacturer drivers CD and install drivers. Also FYI, Windows 7 has great driver support, go to Start –> Control Panel –> Select View By = Small Icons –> Click Windows Update
- Check for updates and click on optional updates, to see which drivers windows 7 found for your computer automatically.
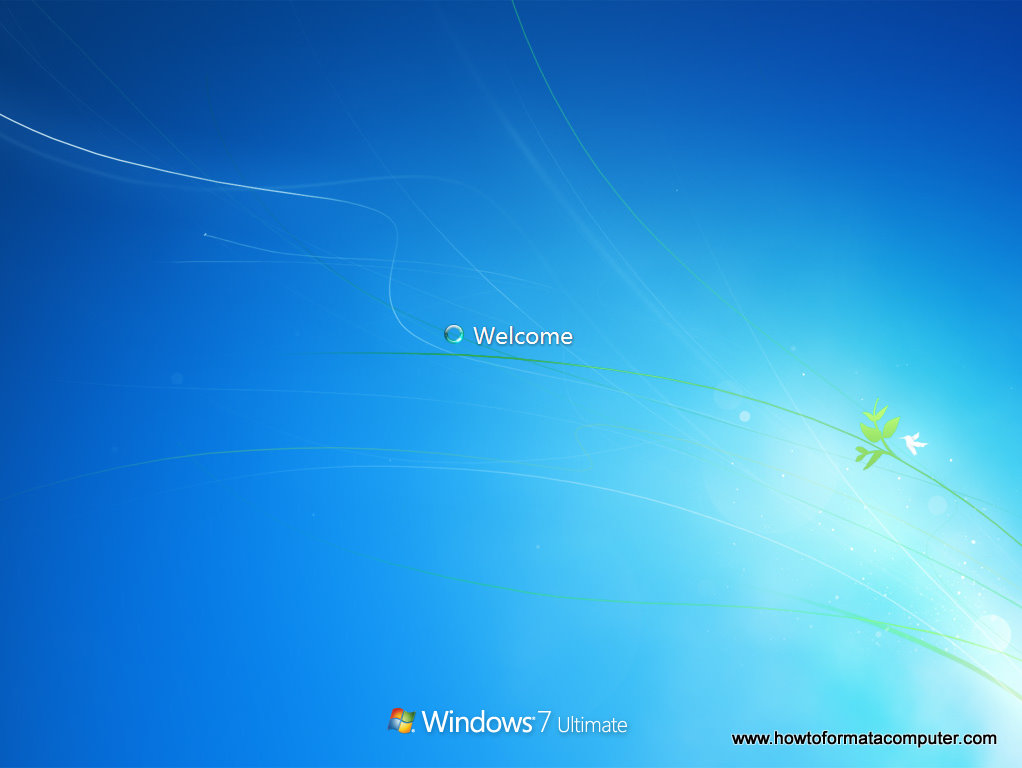
Install Windows 7 - Welcome screen
Subscribe to:
Posts (Atom)
Popular Posts
-
So many people have called to request how to fix this issue. It is a well known fact that more than 40% of phone users in Nigeria use Bla...
-
 Some people have been complaining of having difficulties in setting up the BB Z10, so here comes a a step...
 -
 Below are the data plans for BB10 and the various activation codes BlackBerry 10 Plans Service Validity Inclusive Data Price ...
 -
 Below is how to copy and paste in BB Z10. To highlight text, touch and hold the text. To change your selection, move the cursor ind...
 -
Yes you can still have your contacts in your iphone from your blackberry phone...all you need to do is follow the instructions below and ple...
-
After series of requests by some of my friends to help transfer contacts from their blackberry to iPhone and from Samsung to iPhone i have ...
-
MTN Nigeria is at it again . This time they are enriching the ICT enabled generation. Developers can now sell their applications to millions...
-
Finally the long awaited BlackBerry Q10 is available in Nigeria. MTN Nigeria now have the powerful device . The classic BlackBerry® Keyb...
-
This is the comparison. Take some time and study the differences. HOW THE NEW BLACKBERRY MATCHES UP BlackBerry Z10 Apple iPho...


